Step-by-Step Guide to Setting Up a ButterflyMX Door Controller
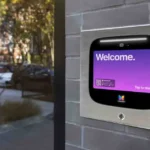
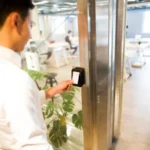
ButterflyMX door controllers provide secure, cloud-based access to doors, gates, and garages without the hassle of traditional keys or fobs. Designed for multi-family residences and commercial buildings, these controllers give property managers full visibility and tenants the convenience of smartphone-based entry.
Here’s a clear, step-by-step guide to setting up a ButterflyMX door controller properly.
Step 1: Understand the Device
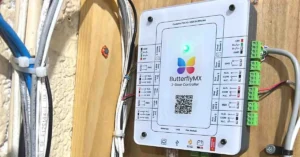
The ButterflyMX door controller is a small but powerful unit that connects to your access points. It communicates with the ButterflyMX cloud via the internet, allowing residents and staff to unlock doors using the mobile app.
Before starting installation, ensure you have:
- A working internet connection (wired or wireless, depending on the model).
- Power supply (PoE or dedicated adapter).
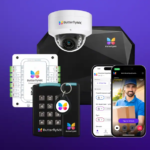
- Compatible access points (electric strike, maglock, or gate motor).
Step 2: Plan the Installation
Planning prevents unnecessary rework later.
- Choose the right door or gate where the controller will be mounted.
- Confirm wiring routes for power and data cables.
- Check door hardware compatibility to ensure smooth integration.
- Review building codes — especially if fire doors or emergency exits are involved.
Step 3: Mount the Door Controller
Once the plan is ready, you can mount the unit:
- Use the included mounting template to mark screw holes.
- Drill holes and install anchors if needed.
- Secure the door controller against the wall or near the access point.
- Keep it in a discreet location to prevent tampering but accessible for maintenance.
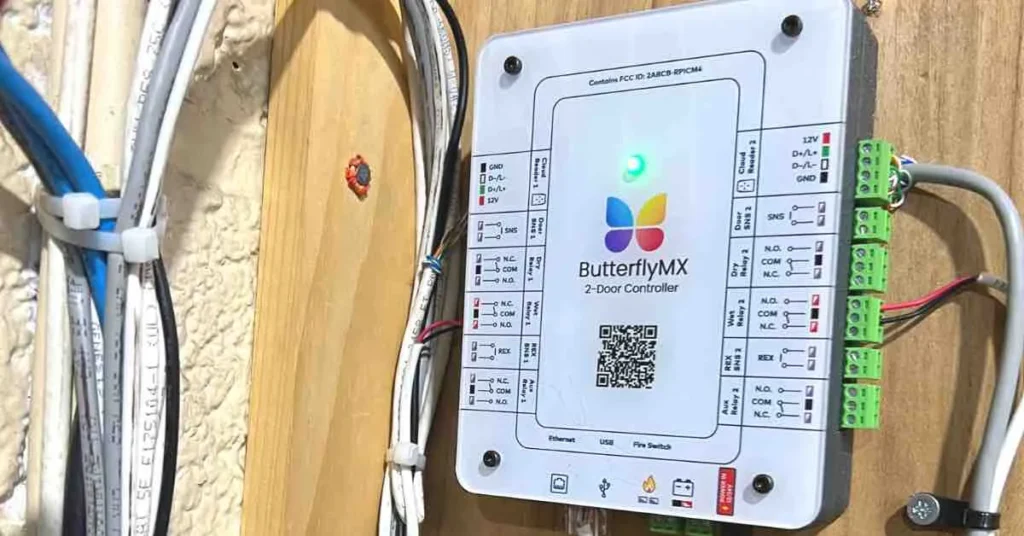
Step 4: Connect Power and Network
- For most models, connect the Ethernet cable to a PoE-enabled switch for both power and internet.
- If using a dedicated power adapter, connect the DC input securely.
- Verify power status with the LED indicators.
- Ensure internet connectivity is stable before proceeding.
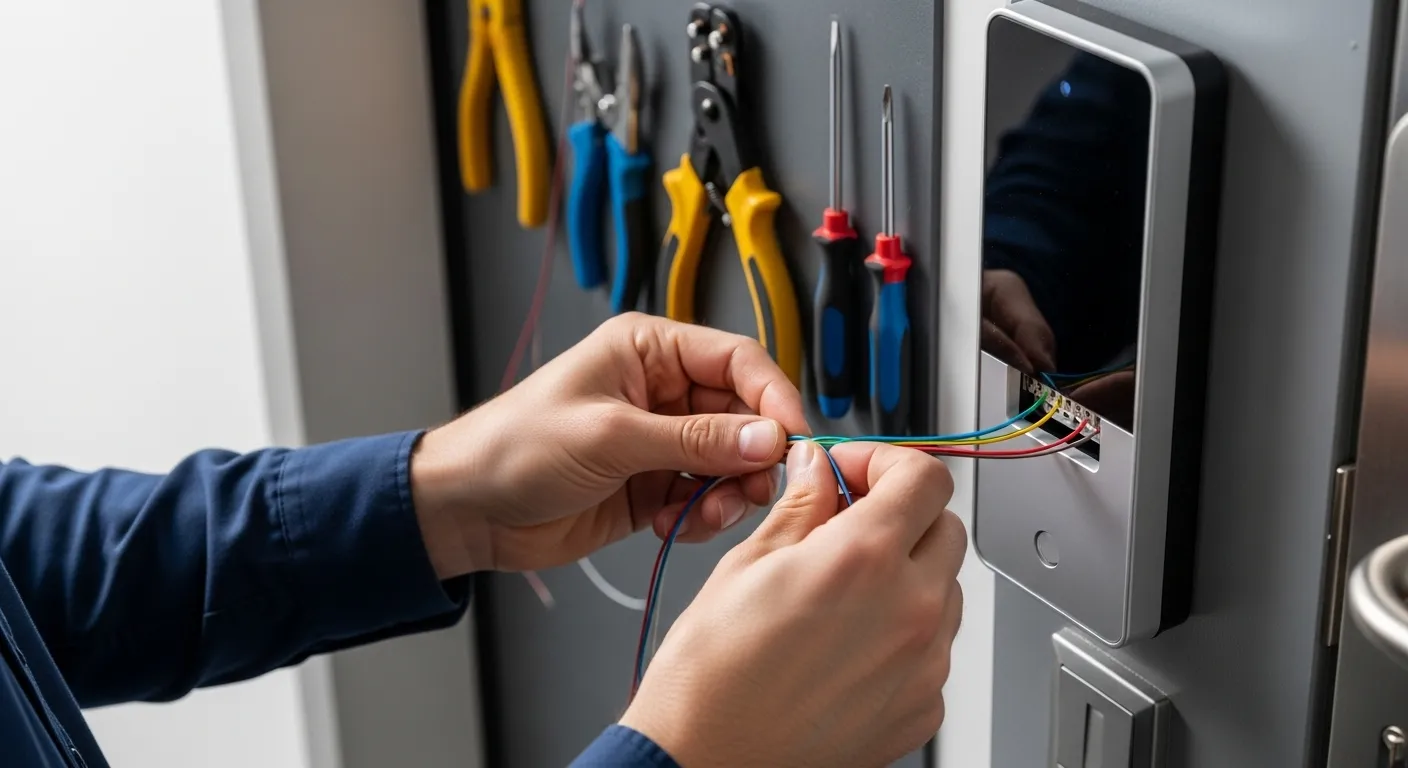
Step 5: Wire to the Access Hardware
Now it’s time to link the controller with your physical entry system:
- Connect wires from the controller to the electric strike or maglock terminals.
- Follow the wiring diagram provided by ButterflyMX.
- Double-check polarity and voltage to avoid damaging the lock.
- Secure all connections with terminal screws or wire nuts.
Step 6: Configure in the ButterflyMX Dashboard
The software side is where the device comes to life:
- Log in to the ButterflyMX property management dashboard.
- Add the new door controller to your property profile.
- Assign permissions to residents, staff, and delivery services.
- Set up schedules (e.g., only staff access after hours).
- Run a test command to confirm the controller responds.
Step 7: Test the Setup
Testing ensures everything is working properly:
- Unlock the door from the mobile app.
- Verify the lock disengages instantly.
- Try from different devices (iOS/Android).
- Simulate a network outage to see if the door functions correctly.
Keep logs of your test results for maintenance records.
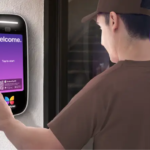
Step 8: Educate Users
Once installed, educate tenants and staff on how to:
- Unlock doors with the ButterflyMX app.
- Share temporary access codes or digital keys.
- Report issues if the lock fails to respond.
Proper onboarding ensures fewer support calls and a smoother user experience.
Step 9: Schedule Maintenance
Although ButterflyMX is designed for reliability, periodic checks keep the system performing:
- Inspect wiring and housing every 6–12 months.
- Test remote access monthly.
- Update firmware when prompted.
Final Thoughts
A ButterflyMX door controller can transform building access into a secure, cloud-based system that’s both convenient and reliable. With proper installation and setup, property managers can streamline access while keeping residents safe.
If your property is in New York or New Jersey, consider hiring MetroCom Security — a certified ButterflyMX installer — to ensure your system is set up to the highest standard.